Saturday, 9 April 2016

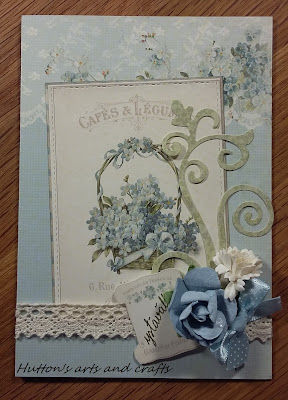
Spring flowers

Last night I had told my husband I'd be in my crafts room making cards. I bit later he came in with a look of amazement "did I just hear your sewing machine?" A little bit earlier I had been in the basement with a saw and big wooden box working on another project.. Who said papercrafting is just cutting and clueing :) 

Another inspiring challenge at Pion Desing this month with their new collection Flowers of Provence. I still have a high pile of old spring collections, so to use up those, I made a set of cards for the challenge. 


Materials: 
Pion Design Fairytale of Spring collection
Wild Orchid Crafts roses
Petaloo Botanical Collection 
Tim Holtz  Alterations Collection Mixed Media 2
Memory Box Tiffany Frame die
Memory Box 


I enter the set of cards to Pion Design April Challenge


Saturday, 26 March 2016

Neverending card tutorial

You know the weekend when the weather is bad and you've got nothing but time... and your craftsroom. Happy days! A couple of weeks ago I had the luxury of such weekend, and I wanted to make something special. Here's one of the projects I had wanted to do for a while, a neverending card. It is so awesome, as it just keeps on going.


It looks complicated, but it really isn't. The most difficult part is to make the design, and I recommend you take some time to think about the story you want to tell with your card. Make sure you have some space for text in there too, for all you see is all you get. No backside of the card for the greeting! 


Step 1 


never ending card infinity card

Cut out 4 pieces of cardstock 3x6 inches each
Score each at 1,5 inch from both ends (green line on the image)
fold lightly on the scoreline 

Step 2


Place two pieces horizontally next to each other, add adhesive on the outer corners 


Step 3 


Place one of the remaining pieces on top vertically, making sure
the corners are aligned. The more precise you are here, the better your card will fold. 


Step 4


Repeat with the other side. Now your card is ready for decorating! 


Decorating

Face 1 

infinity card never ending cardFront cover decorations:
4 pieces 1,3/8 x 2,6/8 inch designer paper, horizontal
2 pieces 2,6/8 x 2,6/8 inch designer paper

I also added a small ribbon and bow


Face 2

never ending card infinity card
Decorations:
4 pieces 1,3/8 x 2,6/8 inch designer paper, vertical
2 pieces 2,6/8 x 2,6/8 inch designer paper

Face 3 

never ending card infinity card
Decorations:
4 pieces 1,3/8 x 1,3/8 inch designer paper (yellow corners)
2 pieces 2,6/8 x 2,6/8 inch designer paper

Note: the red paper is actually part of the face 4 so at this face you will only do the corners and two main images. 


Face 4

never ending card infinity card
Decorations:
4 pieces 1,3/8 x 1,3/8 inch designer paper (blue)
2 pieces 2,6/8 x 2,6/8 inch designer paper

I also added some stamp images from the paper collection.
Note: The top and bottom part of the larger squares are visible on the face 3 too. Something to take into consideration when planning your design and adding decoration on this face! 


You can add little embellishments on any face of the card, but make sure they are not too thick for the card to fold. Cut outs from the same paper work well. 

I also like to distress the edges of the designer paper with Distress Ink. I think it gives the card more depth and character. 


Materials I used: 
Graphic 45 Mother Goose collection 8x8 paper pad
Orange cardstock
Little pieces of green and yellow cardstock for framing some of the images
Ribbons
Distress Ink Tea dye for distressing the edges
Douple sided tape


Thanks for stopping by, I hope you found the tutorial useful! Please live a comment, I love to hear from you! 

Monday, 14 March 2016

Easter greetings

It's the time of the year again, when I start to miss the yellows and greens in the nature. It's still a good month at least before we lose all the snow here, so all I can do is to dream and use the colours in my crafting.

Pion Design March Challenge is all about yellows, greens and Easter. What a perfect challenge for my mood! Here's a couple of Easter cards I made for the challenge. The papers are mainly from the collection Fairytale of Spring, which I found at the depths of my Pion Design paper pile.

Easter greetings


There's still plenty of time to play, and many gorgeous projects to see behind this link : 


Thanks for stopping by! 

Monday, 22 February 2016

Magic of travel

I love to travel and visit new places. I have lived in many countries and visited even more. When I first saw the Graphic 45 Come away with me - collection, I knew I had to make a selection of travel inspired cards. Here are the first two, and more is to come!

Handmade travel greeting card

Handmade travel greeting card

Thursday, 4 February 2016

Fabulous me

Art Impressions challenge this week is about paper piecing. Another technique I had not tried before, I like colouring too much. But, as I have said before, the reason I like the challenges is because you have the motivation to try something you might not otherwise try. And maybe even like it!

I stamped the image on patterned papers for the balloon and her dress. I cut them out and attached to the image which I had stamped in normal white paper I use for stamping. Oh so simple, and so nice!

I think I might give the card to my husband being that he so quietly puts up with the ever growing piles of papercrafting materials in my crafts room :)

Valentine's day cards


Materials used: 

Stamp: Art Impressions Tina Set
Papers: Studio Light Paper Pad
Coloured with Distress markers 

I submit the card to Art Impressions challenge #176 


Thanks for popping by and please, do leave a comment! 

Tuesday, 2 February 2016

Valentine


Valentine's day preparations keep me busy. In Finland Valentine's day is called "Friendship day", so lots of cards for friends too. Here some examples I've made with Pion Design papers. 


Valentine's Paris Flea Market
Pion Desing Paris Flea Market Collection 

Valentine's Paris Flea Market
Pion Design Paris Flea Market Collection


Valentine From my heart
Pion Design From My Heart Collection

The inspiration and quite frankly - the whole model for this card I got from Anne at Pion Design's blog today. Can't wait to get my hands on the gorgeous Easter Greetings collection  But for now, I made this card with papers from Vintage Wedding collection. The folded pocket card has a matching tag inside. Such a simple yet super cute idea! Will be making more of these. 

Valentine Vintage Wedding

Vintage Wedding


Vintage Wedding


Saturday, 30 January 2016

Birthday wishes

In the middle of Valentine's day cardmaking, I made a birthday card for a little boy. In the big box of AI stamps I got from Santa, there was also these cute Front & Backs stamps. I really like the front & backs, they give such a different element to the cards.

The card is 10x15 cm in size, and I decided to make space for some handwritten greetings at the back and leave the opening side blank. 


Birthday cards little boy

Birthday card little boy

Birthday card little boy


Materials used: 
Stamps: Art Impressions: Fence, Scarppie Front & Back, Billy Front & Back 
Papers: Studio Light Paper Pad 11 
Coloured with Distress Inks & Markers